Testing of PowerShell scripts is getting very popular recently. Pester is probably the most used testing framework for PowerShell. If you combine automated testing with a version control system like GIT you get a very powerfull development environment. For example if you change a script and check it into GIT you can do automated tests and it will report if the changes break something. This workflow is called continuous integration and is fundamental to the DevOps workflow in traditional software development.
This tutorial will guide you through a simple automated testing scenario. The version control system we use for this demo is GIT on Visual Studio Team Services or an on-premise Team Foundation Server 2015 installation.
To kick start this tutorial I've a very simple script with two Pester tests. I won't go into details here how Pester works or how you use GIT.
You can download the sample here: PowerShell CI Demo Scripts
Project structure
The structure of the demo project is divided into the following folders:
- PSExample
- Pester (Folder with the original Pester files)
- PSExample (Folder with the PowerShell script and the Pester tests for this script)
- RunPester.ps1 (this executes the Pester tests)
You can see that the Pester framework and the actual PowerShell script is seperated into different folders. This helps to run the Pester tests only on the actual Script and doesn't execute the tests for Pester itself. If you have a lot of PowerShell scripts you probably even want to seperate you test-scripts into another folder.
The RunPester.ps1 is only to execute the Pester tests with the correct parameters. The two important things in this are the OutputFormat, which specifies the format of the test results, and the OutputFile tells where this will be saved.
Import-Module "$PSScriptRoot\Pester\Pester.psm1"
Invoke-Pester -CodeCoverage *.ps1 -Path "$PSScriptRoot\PSExample" -OutputFormat NUnitXml -OutputFile "$PSScriptRoot\TestResult.xml"
Build Definition
Now that we have a working demo project with tests we need to create a build definition. Build definitions are usually used for compiling source code to executables but we can use them to test our PowerShell scripts.
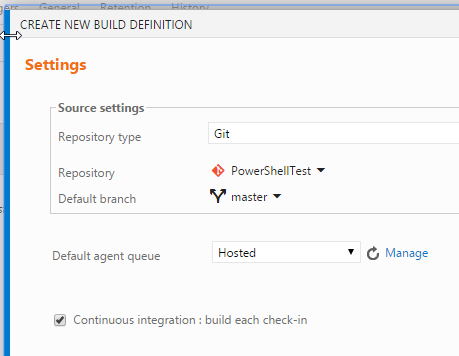
Create a new empty build definition and click next.

On the second page just enable the checkbox "Continuous integration".
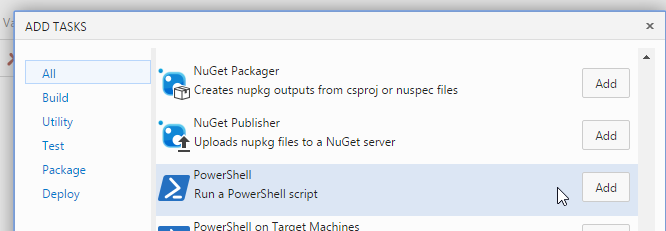
After the wizard finishes we need to a add two steps to our
build definition. First the PowerShell task.
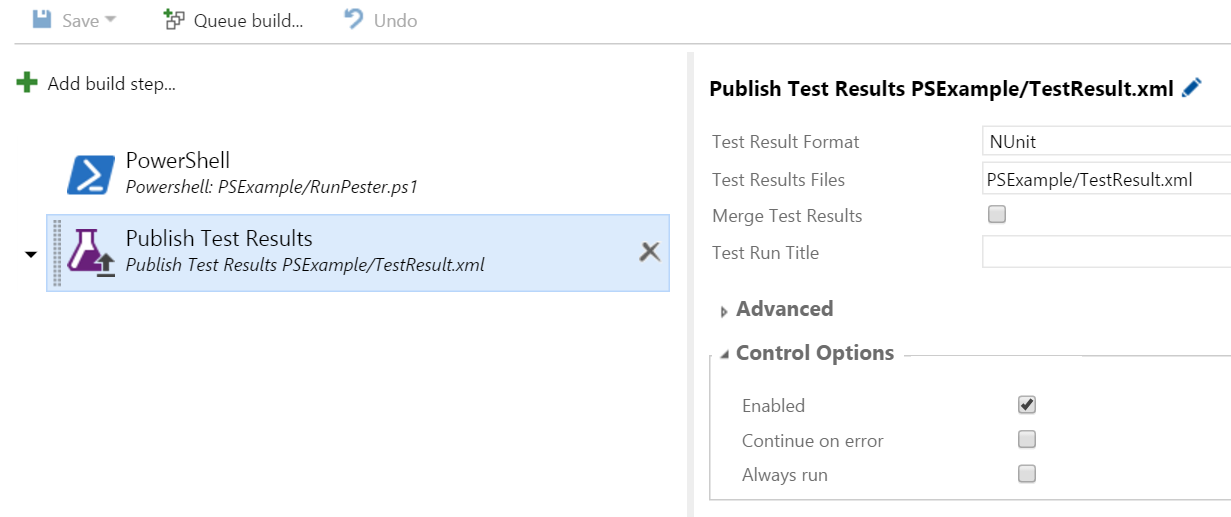
 and then a Publish Test Results
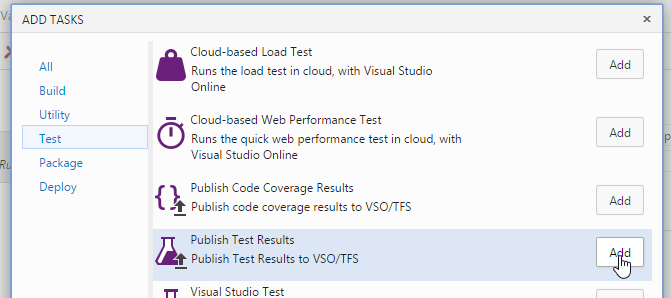
We need to configure the PowerShell task. The important thing here is to select the RunPester.ps1. This will execute the Pester tests while building.
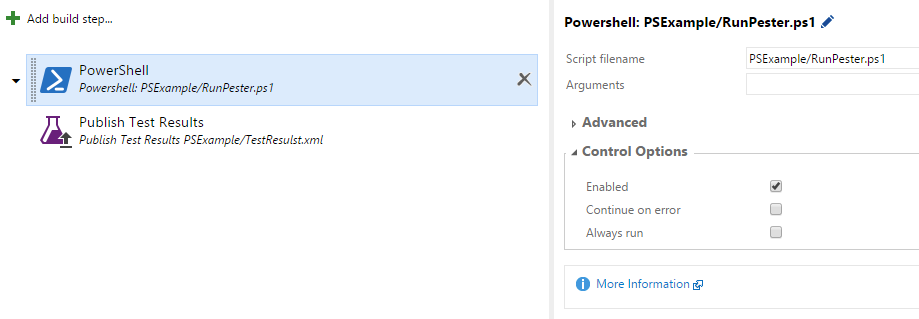
For the second task we need to configure the test result format and set it to NUnit (the one we specified in the RunPester.ps1) and the Test Results Files to the OutputFile from above too.
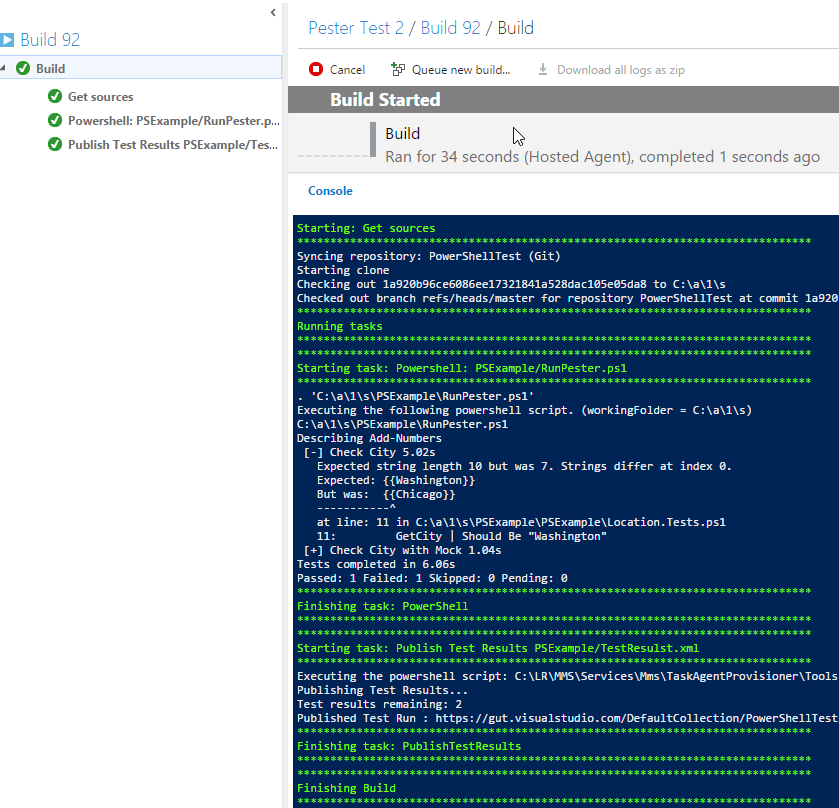
Now we can click save and to manually start a test we can click Queue build.... This will show you the execution of the workflow in a console view.
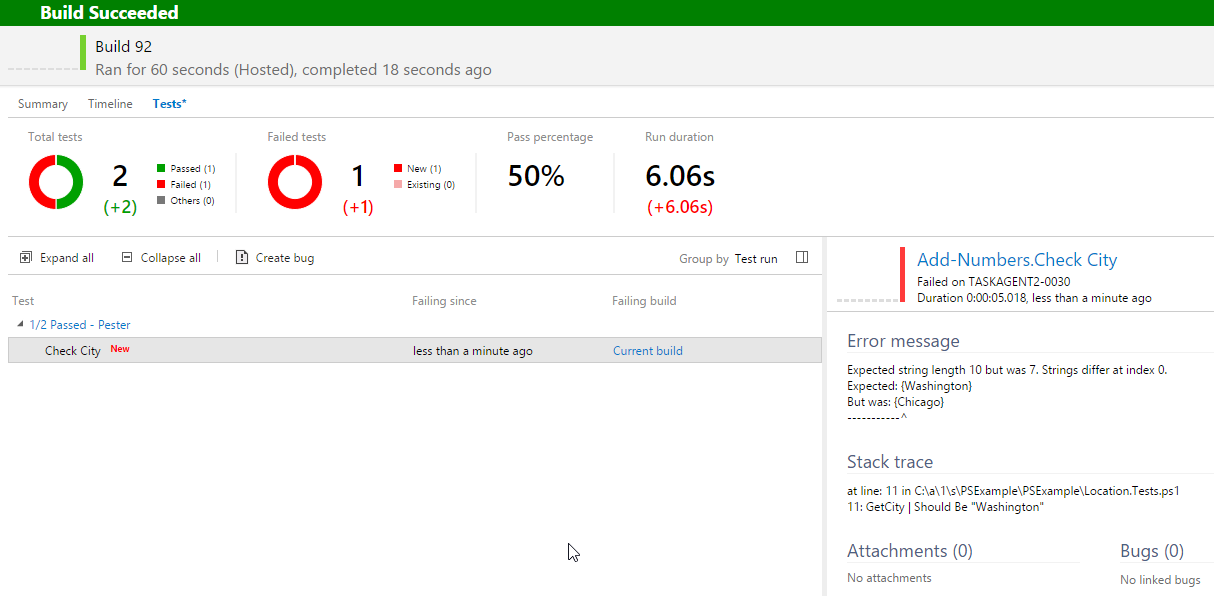
 when the build is complete we can view the full test results like this (the demo script has an intentional geolocation error):
Now every time you check a change into this GIT repository the tests will be executed. You can even let you send a mail when there's an error.
This concludes this tutorial. It should show you the basics of integration tests with PowerShell. There are a lot of advanced options you can explore and customize the experience for your own workflow.
comments powered by Disqus